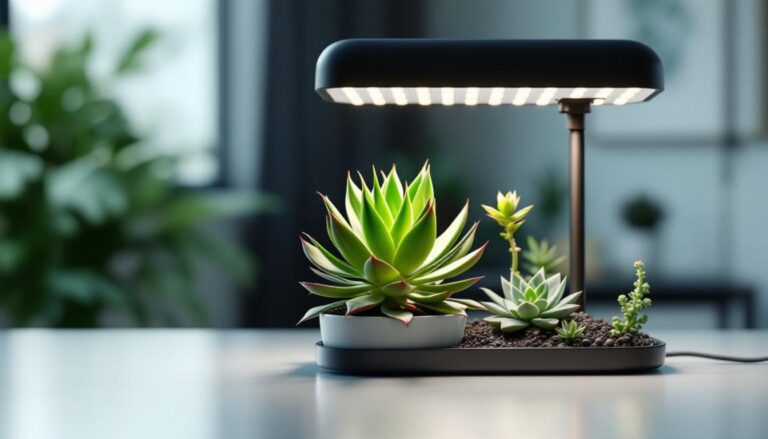
Aloe Vera Plant Care Guide: Tips for Thriving Houseplants Indoor
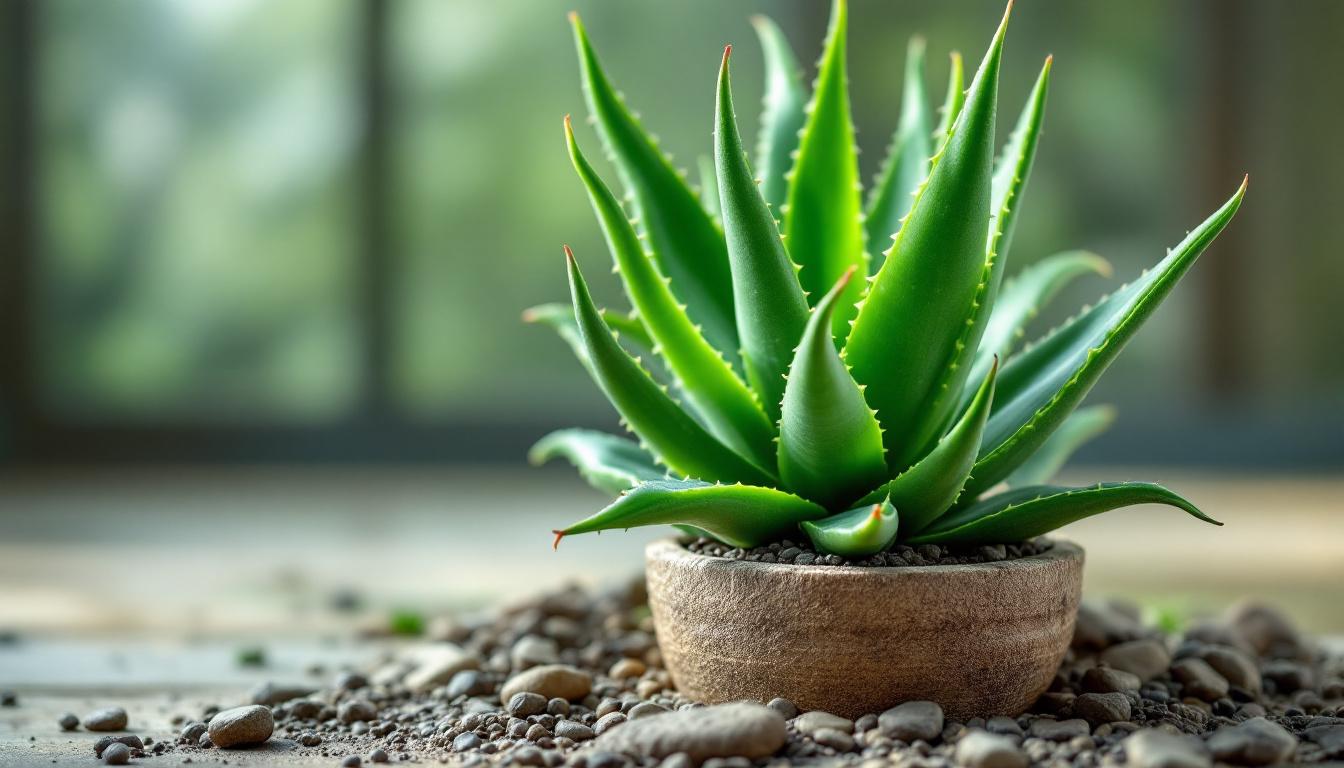
Aloe Vera, is a spiky green plant often popular for its skincare properties from generations. But beyond its gel’s soothing touch, this versatile plant has carved out a spot in home décor everywhere.
Why? Aloe Vera is more than just a pretty looking plant—it’s a natural air purifier and a fantastic addition to any indoor space. Caring for Aloe vera might seem straightforward, but a few key steps can make all the difference between a thriving plant and a droopy one.
In this article, I will share essential tips on Aloe vera plant care, ensuring you know exactly how to keep your green friend happy and healthy.
Whether you’re a seasoned gardener or just starting to explore indoor decor, get ready to learn the art of Aloe vera plant care.
TABLE OF CONTENTS
Overview of Aloe Vera Plant
When it comes to houseplants, few have the history and versatility of aloe vera. This plant is not just about aesthetics; it’s a robust survivor with a rich cultural past.
Let’s find out what makes Aloe vera so special — from its unique features to its significance in various cultures around the globe.
Botanical Characteristics
Aloe vera is a succulent, known for its thick, fleshy leaves that are packed with a soothing gel. These leaves are often bright green and adorned with small white speckles and serrated edges.
It’s fascinating how such a modest plant can house so much potential within its compact structure. Each leaf grows from a central base, forming a rosette pattern that’s visually striking.
Aloe vera can grow up to 24 to 39 inches tall, with individual leaves that reach about 8 to 10 inches in length depending on the environmental parameters. This growth pattern makes it an excellent choice for pots and indoor decor.
The plant thrives in well-drained soil, basking in bright, indirect sunlight. One of its unique features is a natural ability to store water, which means it can survive short periods of neglect. No wonder it’s a favorite among those new to gardening!
Cultural Significance
Aloe vera isn’t just a modern marvel; its use dates back thousands of years. Various cultures, from the ancient Egyptians to the Greeks and Romans, harnessed its healing properties. Ever wondered why it’s often called the “plant of immortality”? It’s because Egyptians thought so highly of it that they included it in burial rituals for pharaohs!
In traditional Chinese medicine and Indian Ayurveda, aloe vera is revered for its cooling effects and healing properties. It’s used to treat skin conditions, digestive issues, and more, acting as a natural remedy for common ailments. What’s truly amazing is how this plant continues to capture the interest of so many, bridging the past and the present with its timeless appeal.
Aloe vera’s journey through history showcases its enduring appeal, providing medicinal and practical benefits across cultures. The next time you reach for this humble plant, you’ll be tapping into a legacy that has been celebrated worldwide.
Optimal Growing Conditions
Aloe vera is one of those plants that seems to thrive on a mixture of minimal fuss and the right conditions. Getting these conditions just right is more art than science. But don’t worry, with a little guidance, you’ll have this hardy plant growing happily in no time.
Light Requirements
Aloe vera loves the sun, but it’s a bit picky about how much it gets. These plants crave bright, indirect sunlight, which means they do best when placed near windows that bathe them in morning or late afternoon sun but shield them from the scorching midday rays. If you’ve ever felt your skin burn after too much sun, imagine that for an aloe—too much direct sunlight can harm their beautiful leaves, turning them brown and crispy at the edges. It’s best to avoid south-facing windows unless you have sheer curtains.
Where’s the best spot in the house? If you’ve got an east- or west-facing window, that would be perfect. You might find it useful to rotate your aloe occasionally, ensuring all sides bask equally in the sun’s embrace. This helps the plant grow evenly and prevents it from leaning toward the light.
Temperature and Humidity
The aloe vera plant thrives in temperatures that keep it comfortable—not too hot and not too cold. Ideally, aim for a temperature range between 60°F and 75°F (15°C to 24°C). Think of it as keeping your aloe in that perfect springtime sweet spot. During colder months, if the room turns chilly, make sure your aloe isn’t exposed to temperatures below 50°F (10°C), or it might sulk—or worse, suffer frost damage.
Humidity is another factor where aloe vera plays it cool. This plant prefers dry air over the muggy humidity that some other tropical plants love. Too much moisture hanging around in the air can make it susceptible to root rot, so there’s no need to mist your aloe or keep it in a humid bathroom. A typical room with average humidity levels will do just fine, keeping things as natural as possible.
Understanding your plant’s preferences for light, temperature, and humidity will go a long way in ensuring your aloe vera stands tall and lush.
Watering Your Aloe Vera
Watering your aloe vera plant might seem simple, but it’s vital to its health. Aloe vera prefers a relaxed approach when it comes to watering. Give it too much, and it may drown; too little, and it may dry out. Unlocking the secrets of its ideal watering needs will ensure your plant continues to thrive. So let’s dive right in!
Signs of Overwatering vs. Underwatering
Knowing the balance between overwatering and underwatering can be a game-changer. How do you know if your aloe is getting too much or too little water?
Overwatering Signs:
- Mushy leaves: If the leaves are squishy to the touch, they’re drowning in excess water.
- Root rot: A common, unfortunate side effect, signified by a foul smell and discolored roots.
- Yellowing leaves: This might indicate that your plant is practically waving a “Help!” flag, pleading for you to ease up on the watering.
Underwatering Signs:
- Shriveled leaves: When aloe leaves start to wrinkle, they are telling you they’re thirsty.
- Brown tips: Dry and crispy leaf edges can signal that more hydration is needed.
- Stunted growth: If your plant seems stuck in time, with no new growth, it could be longing for a drink.
Watering Schedule
Creating the perfect watering schedule for your aloe vera depends on various factors, like the season and your home’s climate. Here’s a simple plan to follow:
Spring and Summer:
- Water your aloe every two to three weeks, allowing the soil to dry out entirely between waterings. These seasons are when your plant is most active, sometimes signaling with fresh leaves and growth spurts.
Fall and Winter:
- During the cooler months, cut back on watering to once a month. Aloe vera goes into a dormant phase, needing less water to sustain its slower metabolism. Your intuition might be to water less often, and that’s a good call!
The key is to observe your plant closely, feeling the soil and noticing any changes in its appearance. A moisture meter can be a handy tool, but trust your senses too. Touching the soil regularly and adjusting your schedule based on the plant’s mood can make all the difference. Aim for a routine that respects the individuality of your aloe vera’s needs—it’s your green buddy, after all, and deserves the love and attention it thrives on!
Soil and Potting Techniques
As part of nurturing your aloe vera plant, selecting the right pot and soil can be as crucial as finding the perfect roommate. Both need to complement each other to create an environment where your plant can flourish. Let’s explore what works best for these resilient beauties.
Choosing the Right Pot
Choosing a pot for your aloe vera is a bit like picking the right shoes for a long walk. It’s not just about style; it’s about functionality. The pot you select should have:
- Drainage holes: These are non-negotiable. Aloe vera doesn’t do well in waterlogged conditions. Without drainage, the roots may sit in water, leading to rot—a sure path to plant disaster.
- Material matters: Terracotta pots are often ideal. They’re porous, allowing excess moisture to escape and the soil to dry out naturally between waterings. Plastic and ceramic pots can work too, as long as they have drainage holes.
Size is also a factor. Aloes prefer a snug fit. A pot that’s about the same width as your plant is a good start. Think of it as setting boundaries—a pot too big can make it tricky for the plant to balance its water needs.
Soil Requirements
Getting the soil right is like ensuring your aloe has a supportive mattress—firm, with just the right amount of give to keep things comfortable. Here’s a quick breakdown of the soil requirements:
- Well-Draining Mix: Aloe vera thrives in a blend that’s airy and free-draining. A cactus or succulent potting mix is perfect. These are specially formulated to mimic the plant’s natural habitat. You can make your own mix by combining two parts potting soil, one part sand, and one part perlite or pumice.
- Why Drainage is Key: Aloe vera’s roots need to breathe. Excess moisture can cut off oxygen, leading to root rot. With a well-draining mix, the water flows through the soil, leaving roots with just what they need and removing any excess.
By considering the pot and soil together, you set up your aloe vera for success. Each decision supports the next, creating a harmonious setup where your plant can really shine. It’s like building a home that’s designed for happiness and health, ensuring your aloe vera plant care efforts result in a lively, thriving companion.
Fertilizing Aloe Vera
Feeding your aloe vera might not be the first thing on your mind, but it plays an essential role in the plant’s overall health. Think of it as giving your plant a nutritious meal—it doesn’t need it too often but appreciates the boost during the growing season. Here’s how you can keep your aloe vera thriving with the right fertilization approach.
Best Fertilizers to Use
When it comes to choosing a fertilizer for aloe vera, less is more. Aloes aren’t heavy feeders, so a gentle boost is all they need. Here are some fertilizer options:
- Liquid Fertilizers: A half-strength liquid fertilizer works wonders. Look for one labeled for succulents or cacti, as these are formulated to cater to their specific needs.
- Organic Mixes: An organic option, like a seaweed-based fertilizer, can provide the gentle nutrients your aloe vera craves. This keeps things natural and friendly for both your plant and the environment.
- Balanced Fertilizer: A balanced 10-40-10 or 15-30-15 fertilizer, diluted to half strength, is also a good choice. The higher phosphorus content supports root and flower development.
The key here is dilution—aloe vera thrives on less rather than more. Using too much fertilizer can lead to a salt buildup, which is harmful to their roots. Always err on the side of caution.
Frequency of Fertilization
You might wonder just how often your aloe vera needs feeding. During the active growing season, from spring to early fall, is when they benefit most from a little extra love. Here’s a simple schedule:
- Spring and Summer: Fertilize once a month. This aligns with their natural growth spurts and energy needs.
- Fall and Winter: Skip the fertilizer. Aloe vera doesn’t grow much during these months. Giving it a rest mirrors its natural dormancy period.
Remember, every plant is unique, and yours might show you its preferences. Keep an eye on its growth patterns and adjust as needed. If it’s growing well and is vibrantly colored, you’re likely on the right track. Fertilization provides that needed balance—like ensuring your aloe vera has its favorite snack without overindulging.
Common Pests and Diseases
Caring for your aloe vera plant means more than just providing the right light and water; it’s also about being vigilant against pesky invaders that could threaten its health. Recognizing these issues early on is key to keeping your plant thriving.
Recognizing Pest Infestations
Aloe vera plants are generally hardy but can fall victim to a range of common pests. Knowing what to look for can make a world of difference:
- Aphids: These tiny sap-suckers usually congregate on new growth and can cause leaves to curl. Look for clusters beneath the leaves or around flower buds.
- Mealybugs: If you see white, cotton-like masses on the leaves or in the leaf axils, you’ve likely got mealybugs. They’re sneaky but leave behind sticky residue.
- Spider Mites: Tiny and hard to spot, these pests give themselves away with fine webbing and a dusty appearance on the leaves.
Other pests to be mindful of include thrips and scale insects. They’re less common but can still hitch a ride indoors. Keep an eye out for any unusual spotting, discoloration, or leaf damage. Regular checks under the leaves are crucial, as these pests love to hide.
Preventative Measures
Stopping pest problems before they start is your best defense. By following a few simple strategies, you can protect your aloe vera from becoming a bug’s new home:
- Regular Inspections: Make it a habit to inspect your plant weekly. Spotting issues early allows for quick intervention.
- Isolate New Plants: Whenever you bring a new plant home, keep it separate for a week to ensure no pests hitch a ride indoors.
- Maintain Cleanliness: Dust your plants and clean their leaves gently with a damp cloth. This limits places for pests to hide and helps your plant photosynthesize efficiently.
- Adequate Air Circulation: Ensure good airflow around your plants. Crowded conditions encourage moisture buildup, inviting pests and diseases.
By staying proactive and vigilant, you’ll be set to tackle any pest challenges that come your way. Remember, a healthy aloe vera is a resilient one, equipped to fend off invasions with a bit of help from you.
Repotting Aloe Vera
Like most plants, aloe vera occasionally needs a fresh start. Repotting isn’t just about moving to a new pot—it’s giving your plant the room it needs to keep thriving. When done right, it can make a significant difference in your aloe vera plant care routine. Let’s explore when it’s time to repot and how to do it seamlessly.
When to Repot
Wondering if it’s time to give your aloe vera a new home? Here are some signs that indicate it’s time to consider repotting:
- Root Bound: If you notice roots poking out from the drainage holes, your aloe has outgrown its pot.
- Slow Growth: Sluggish or stunted growth can mean it’s time for a bigger pot or fresh soil.
- Top-Heavy Aloe: When your plant becomes top-heavy and unsteady, it indicates the roots need more space.
- Old or Depleted Soil: Over time, soil loses nutrients and can become compacted, making repotting essential.
Your aloe might not speak up, but these signs are its way of saying, “Help me stretch!”
Step-by-Step Repotting Guide
Ready to repot your aloe vera? It’s easier than you might think. Follow these simple steps to give your plant the upgrade it deserves:
- Gather Your Supplies: You’ll need a new pot (about 1-2 inches wider than the current one), fresh succulent potting mix, a trowel, and gloves to protect against sharp thorns.
- Water in Advance: Water your aloe a couple of days prior to repotting. This helps loosen the soil and reduces transplant shock.
- Prepare the New Pot: Ensure the pot has drainage holes. Partially fill it with potting mix, not packing it too tightly.
- Remove Aloe Vera Carefully: Gently tip the plant sideways and support its base. Tap the pot to loosen the soil and carefully slide the plant out.
- Inspect the Roots: Check for any signs of rot or damage. Healthy roots should be firm and light in color. Trim any mushy or brown roots with clean scissors.
- Place in the New Pot: Position the aloe in its new pot, ensuring the base of the leaves sits just above the soil line. Add more potting mix around the plant, firming it gently.
- Water Sparingly After Repotting: Give the plant a little time to adjust before its first watering. Let it settle for a few days, promoting root healing.
- Find the Perfect Spot: Return the plant to a consistent spot with indirect sunlight to minimize stress.
Repotting your aloe vera doesn’t have to be daunting. Think of it like switching out of an old, tight sweater into something that allows for more growth and comfort. By taking these steps, you’ll ensure your plant can flourish in its new pot and space.
Harvesting Aloe Vera Leaves
When your aloe vera is thriving and lush, you’re not just a proud plant parent—you’re also sitting on a treasure trove of soothing gel. Harvesting aloe leaves is a straightforward task, but doing it carefully ensures both your plant’s health and gel supply. Let’s look at some best practices for harvesting and exciting uses for the gel.
Best Practices for Harvesting
So, how do you get to that gooey goodness without harming your plant? It’s all about precision and care:
- Select the Right Leaves: Aim for the outermost leaves, as they are mature and often larger, ensuring you get more gel. These leaves are like the plant’s reserves, ready for gentle use.
- Use a Sharp Knife: A clean, sharp knife provides a smooth cut and minimizes damage to the plant. Think of it like slicing through a ripe avocado—you want it to be clean and swift.
- Angle the Cut: Cut the leaf close to the base at a slight angle. This mimics the plant’s natural break point, allowing it to heal faster. It’s a bit like giving your plant a haircut, snipping only where it’s needed.
- Avoid the Inner Circle: Never take more than a third of the plant to keep it healthy. Leave the inner circle of leaves intact, allowing it to continue growing strong.
- Clean Tools Matter: After harvesting, clean your tools. This prevents the spread of any diseases or pests to your other plants.
Think of harvesting like borrowing from nature—it’s good to be respectful and gentle with your plant, ensuring it remains a happy, thriving part of your home decor.
Uses for Aloe Vera Gel
You’ve got your aloe vera gel—now what? The possibilities are endless and super practical. Here are some ways to put that soothing gel to good use:
- Skincare Wonder: Aloe gel is a natural moisturizer, perfect for soothing sunburns or acting as a hydrating mask. It’s like giving your skin a drink of water, without any greasy residue.
- Hair Care Hero: Aloe vera can be a natural conditioner, helping with dandruff and giving your hair a healthy shine. Think of it as your locks’ best friend—nourishing and strengthening from root to tip.
- First Aid Fave: Small cuts or insect bites? Aloe’s cooling and healing properties come to the rescue, helping reduce inflammation and aiding faster healing.
- Boost Your Smoothies: For an immune and digestion boost, many people add a bit of the gel to their smoothies. Make sure to remove any latex, the yellow layer just under the skin, which can be irritating.
Using your aloe vera gel taps into its endless versatility, proving this plant is more than just a green companion. Whether for beauty, health, or first aid, you’re equipped with nature’s own do-it-all remedy. Now you’ve got even more reason to love your succulent superstar!
Maintaining Your Aloe Vera
Taking care of your aloe vera plant is like having a low-maintenance friend—it requires a little attention but gives back so much more. Let’s break down some steps to ensure your green companion stays lively and lush.
Regular Observations
Just like checking in on your friends, keeping an eye on your aloe helps spot any changes. Notice if the leaves are perky and bright, or if they have a droopy attitude. Any changes can be a red flag, signaling a need for adjustments in their environment.
Rotating for Even Growth
Ever notice how plants lean toward the light? Aloes do that too! Rotating your plant helps it grow evenly, giving each side equal sunbathing time, much like spinning a skillet for even cooking. A simple turn every couple of weeks can do wonders.
Keeping it Clean
Dust on leaves can block sunlight, just as fingerprints smudge a phone screen. Wipe down your plant’s leaves gently with a damp cloth to keep them free of debris. Clean leaves absorb sunlight more efficiently, boosting photosynthesis and overall health.
Pruning the Right Way
Pruning your aloe isn’t rocket science but doing it right ensures your plant’s health. Snip away dried or brown leaves at the base. This is like decluttering a desk—removing the old to let new growth flourish.
Staying Attuned to Seasons
Much like we swap our wardrobes with the seasons, adjusting care routines with the changing weather keeps aloe happy. During summer, it might need more water, while winter calls for restraint. Think of it as a seasonal tune-up for your plant.
Syncing with Nature’s Cycles
Aloe veras have natural rhythms of growth and dormancy. Syncing with these cycles, like giving nutrients during its growth phase and a break during dormancy, ensures it functions at its best. It’s about giving your plant what it needs when it truly craves it.
By maintaining these simple practices, you can set your aloe vera up for a long and healthy life. Your indoor oasis is just a few thoughtful steps away, turning plant care into a rewarding experience.
Conclusion
Aloe vera plants bring a slice of nature indoors with minimal fuss. They’re all about basking in sunlight, sipping water sparingly, and thriving with a bit of care. Smart soil choices, the right pot, and occasional feeding help them flourish.
Keep an eye open for pests and be ready to give them a new pot home when needed. Plant care isn’t just a task; it’s a journey. Dive into the process, enjoy each step, and see how these green living plants uplift your space and mood.
Ready to let your aloe shine? Start incorporating them into your home decor and gardening routine today.
FAQ About Aloe Vera Plant Care
When it comes to aloe vera plant care, questions are common, and having answers handy can be a lifesaver. So, let’s tackle some frequently asked questions to keep your green friend in tip-top shape. After all, knowing how to resolve these concerns can transform your plant from wilting to wonderful in no time.
How Often Should I Water My Aloe Vera?
Even though aloe vera is a succulent, it doesn’t like being drenched. I water mine every two to three weeks, letting the soil dry out between waterings. This ensures the roots aren’t sitting in soggy dirt. Remember, less is more with this plant—like a friend you don’t need to check on every day, aloe thrives when given space. During winter, I scale back to once a month since the plant’s growth slows down.
Can Aloe Vera Be Placed Outdoors?
Aloe vera loves sunshine but isn’t a fan of extremes. Where you live will determine whether outdoor life is suitable. In mild climates, keeping it outside is okay, as long as it’s shielded from harsh midday sun and temperatures don’t drop below 50°F (10°C). If the weather dips, bring it indoors. Think of aloe as a fair-weather friend, happiest in a stable, cozy environment.
Why Is My Aloe Vera Turning Brown?
Brown tips on aloe are as obvious as a loud alarm clock—they tell you something’s off. It could be overwatering, sunburn, or even a drafty spot. Check the light; too much direct sun can burn the leaves, and drafts can chill the plant. Adjusting the watering schedule often fixes the issue. It’s much like adjusting your daily routine—you tweak things here and there until it works.
What’s the Proper Pot Size for Aloe Vera?
Picking the right pot is like choosing shoes that fit just right. I make sure the pot has drainage holes, and its size is similar to the plant’s width. Aloes appreciate a snug fit without swimming in too much soil, which can lead to overwatering. Terracotta pots are my go-to since they breathe well, but any pot with good drainage will do the trick.
How Can I Propagate Aloe Vera?
If your aloe vera is doing well, you might notice little pups or offsets around its base. These are baby plants—a perfect opportunity to expand your collection. To propagate, gently separate a pup from the mother plant, ensuring it has its own roots. Then, plant it in a small pot with cactus soil. It’s like giving a friend a start in a new apartment—make sure there’s space and resources, and watch it flourish!
By addressing these key concerns, you can enhance your aloe vera plant care skills, ensuring your plant remains a vibrant part of your home. With a little attention and love, your aloe vera will thrive, providing beauty and benefits for years to come.

